Lightroom: Where * Bright Ideas* are Created!

Over the past 10 weeks, I have been introduced to the Adobe Creative Cloud Suite through various projects in my Style and Design Class for public relations. Prior to this class, I had very limited knowledge about what these programs were, what they could be used for and how essential they can be for one’s own design knowledge.
When I first started learning about the Adobe applications, I was apprehensive because computers and I do not mesh well. All of the different tools and buttons in the Adobe software looked like a math equation I could never solve. So, I started out slow by watching tutorial videos for Photoshop, Lightroom, InDesign and Illustrator.
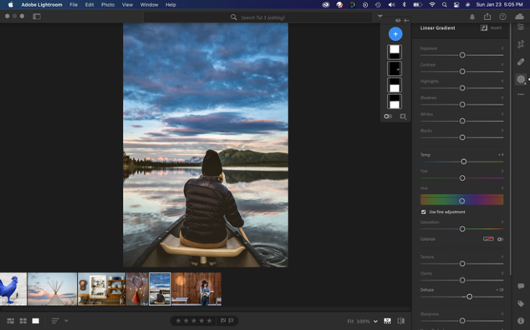
Each of these programs allowed me to put my imagination into something I had created on my own. Learning the brightness tool in Photoshop, the linear gradient tool in Lightroom, the ellipse tool in InDesign, and the shape builder tool in Illustrator were not as scary as I thought.
As I started to work more and more with these programs in and outside of class I naturally started to gravitate towards Lightroom the most. In particular, I found that I really enjoyed the user-friendly aspect of editing photographs. This program also offers a phone app that allows for easy accessibility on the go.
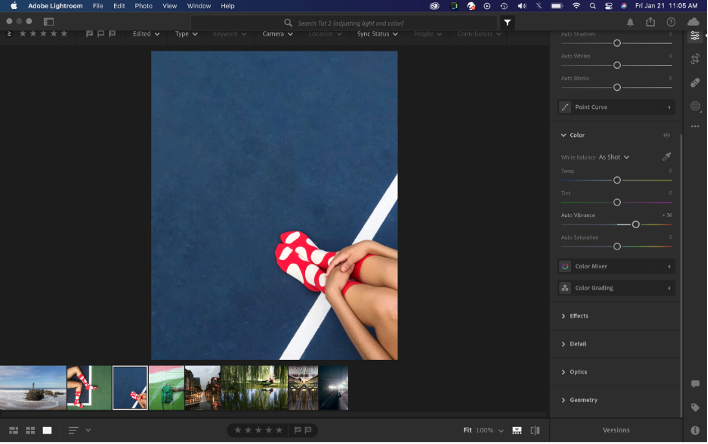
One of the many useful features that Lightroom offers is color saturation. This allows the user to use the vibrance and saturation sliders in the toolbar to reduce or increase color intensity in photos. This tool allows you to highlight specific colors in order to make them stand out more.

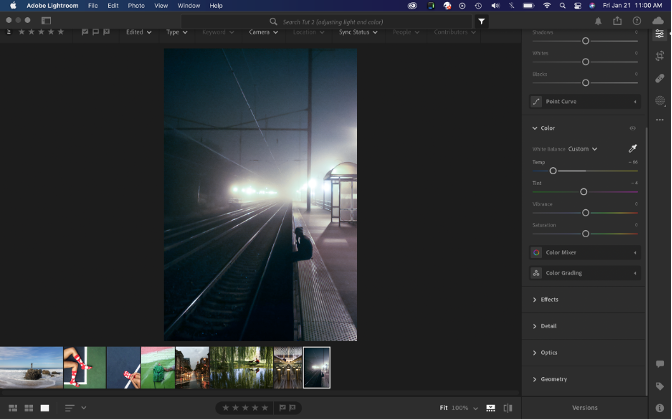
Lightroom’s white balance tools are also one of my favorite features to use. If an image has an unsavory lighting that you want to change you can simply adjust the temp slider between blue and yellow and the tint slider between green and magenta. In the image below I used the temp slider to change the color of the picture’s lighting. I moved the temp slider over to the blue side of the slider so that the lighting would take on a blue tint.

And Bam! You can change your light casting to give it a different look. I love this tool because not only is it fun to use, but you can completely change what a picture looks like as well as the feel of the image. In the image above, the effect of the blue temp gives the image a colder feel to it.
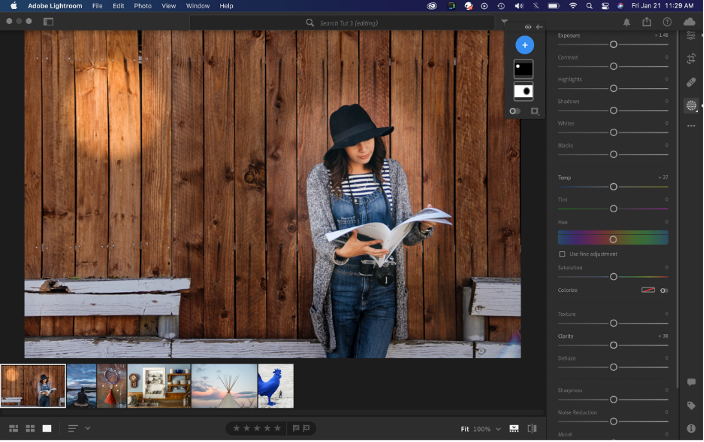
The radial gradient tool is also one of my favorite tools that I have learned when I decided I was ready to go beyond the basic features offered. The radial gradient tool applies a localized adjustment in or outside an oval shaped area. Using this tool you can create natural looking lighting effects such as the lightning around the person’s head and on the wall in the image below. All you have to do is select the radial gradient tool and drag it over the area where you want to adjust the lighting. Once you pick an area you can adjust the size of the area you wish to cover.

While these programs can seem complex and be overwhelming, it is important to keep working at them because they can be so helpful in and outside of the classroom. They are also just fun to play around with. If you ever need additional help Adobe has some amazing Lightroom tutorials that I encourage you to watch!
Enjoy making your pictures better and brighter!
